SSO
SSO support for enterprise users. Pusher dashboard currently supports SSO with Okta.
Note: SSO support is only available to Enterprise plans. Contact sales for more information.
∞ Okta
∞ Step 1: Create an application on Okta
As an Okta administrator, create a new Application for Pusher with the following parameters:
- Sign-in method: OIDC - OpenID Connect
- Application type: Web Application
- Application Name: Pusher
- Sign-in redirect URIs: https://dashboard.pusher.com/accounts/auth/okta/callback
- Sign-out redirect URIs: https://dashboard.pusher.com/accounts/sign_in
- Initiate login URI: https://dashboard.pusher.com/accounts/sign_in
- Login initiated by: Either Okta or App
∞ Step 2: Add your Okta settings to Pusher dashboard
To set up SSO with Okta:
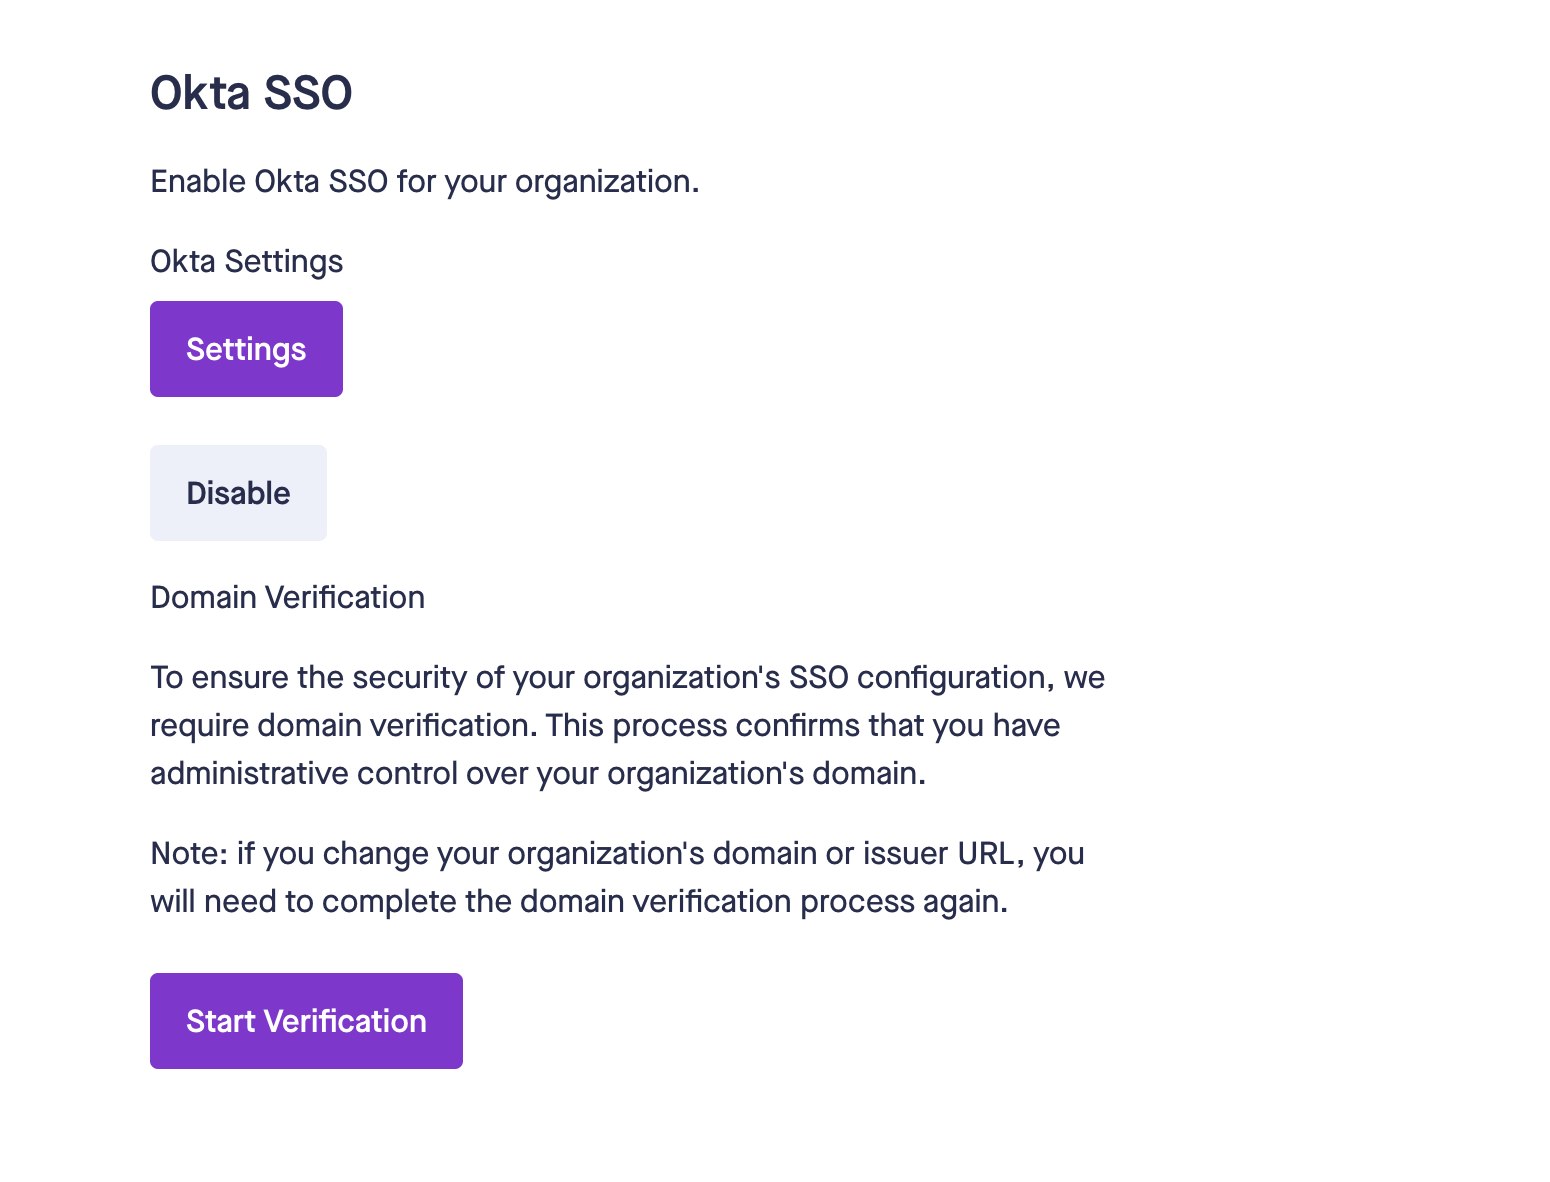
- Navigate to your Pusher Account page and locate the Okta SSO section
- Click enable
- Fill in your Okta settings in the form
- Organization Domain: used to verify the ownership of the login email domains
- Issuer URL: should be in the format https://mydomain.okta.com
- Client ID & Client Secret: obtained from your Okta application
- Authorize URL: defaults to $ISSUER_URL/oauth2/default/v1/authorize. Modify if necessary
- Token URL: defaults to $ISSUER_URL/oauth2/default/v1/token. Modify if necessary
- User Info URL: defaults to $ISSUER_URL/oauth2/default/v1/userinfo. Modify if necessary
- Click Save
- Click Start Verification.
- Follow the instructions displayed in the dashboard to add the TXT record to your DNS configuration.
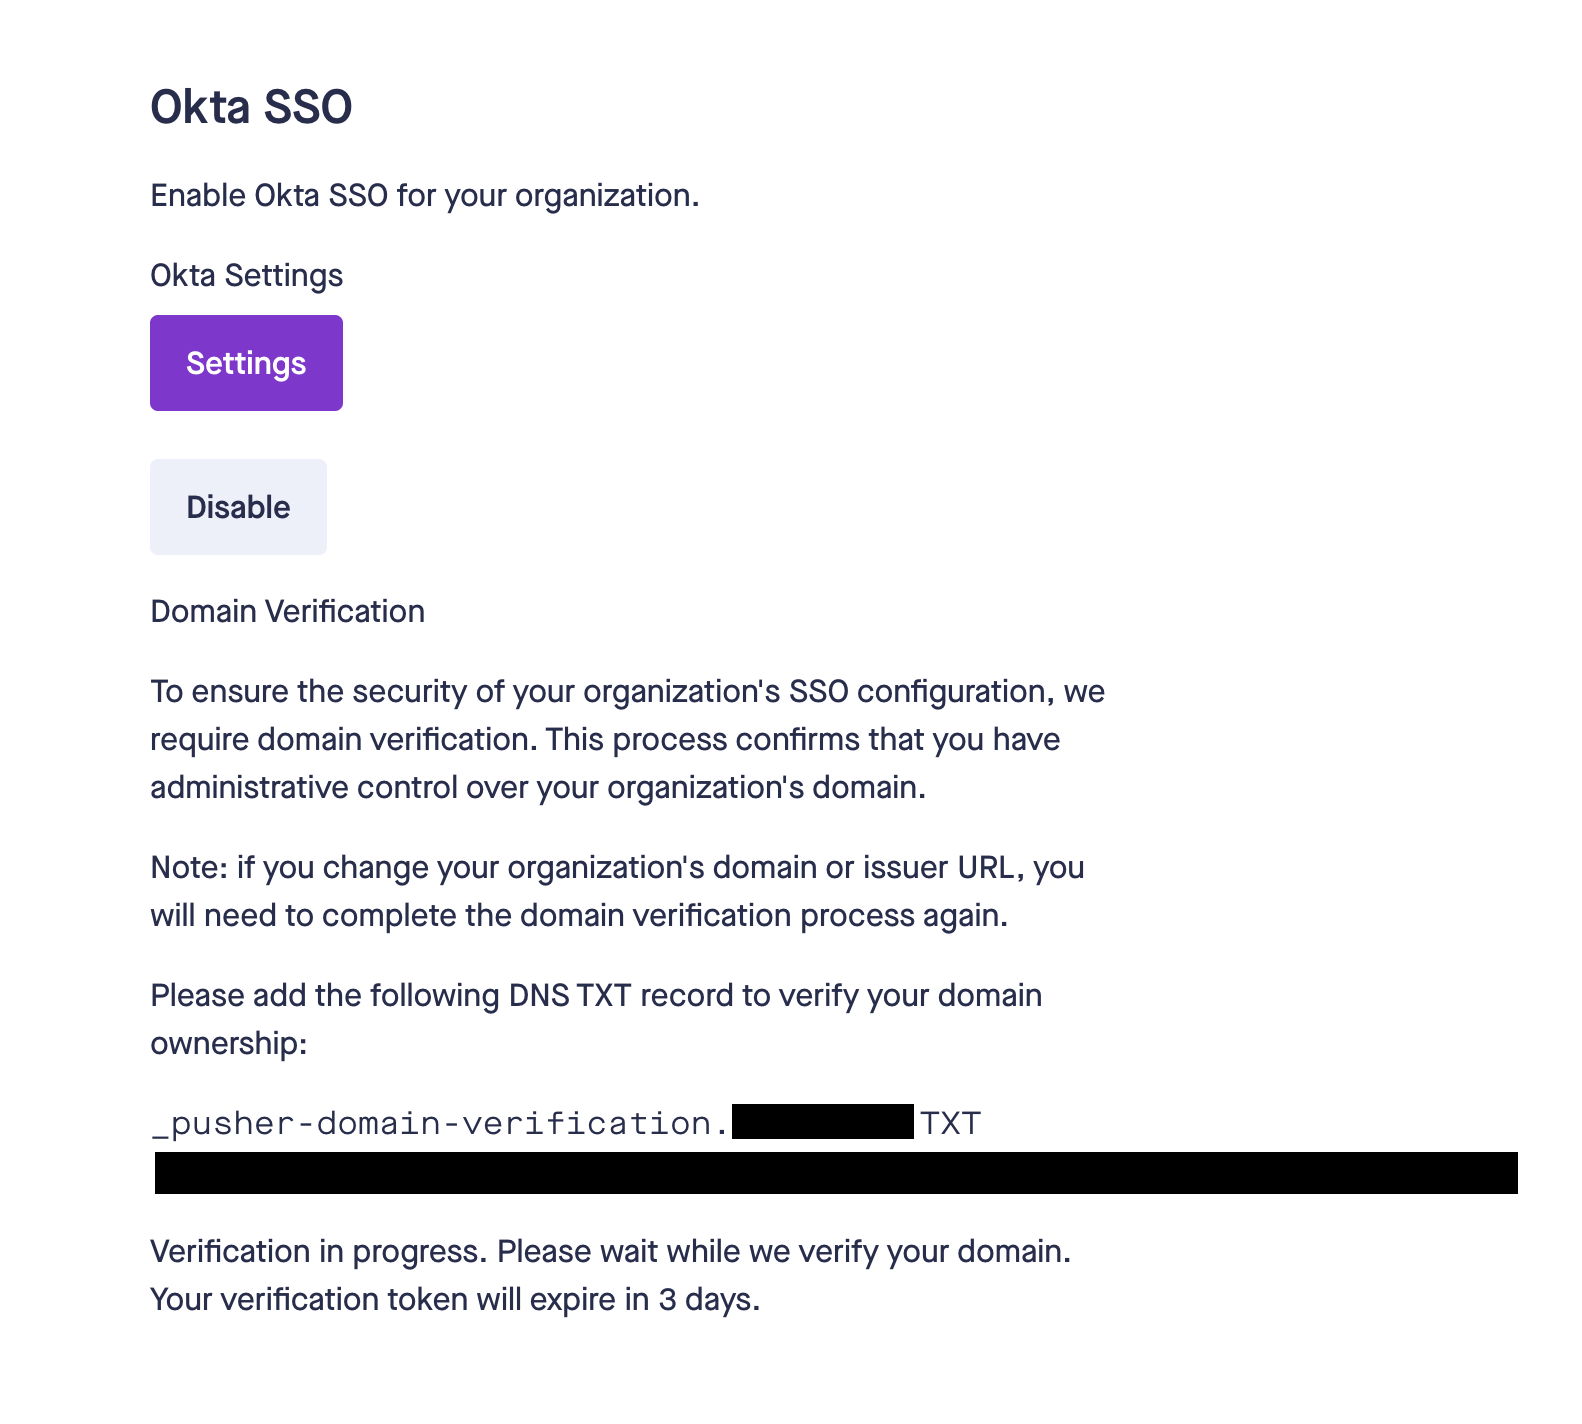
Pusher will work to verify the domain in the background. - Once the domain is verified, you will see a similar message in the dashboard:
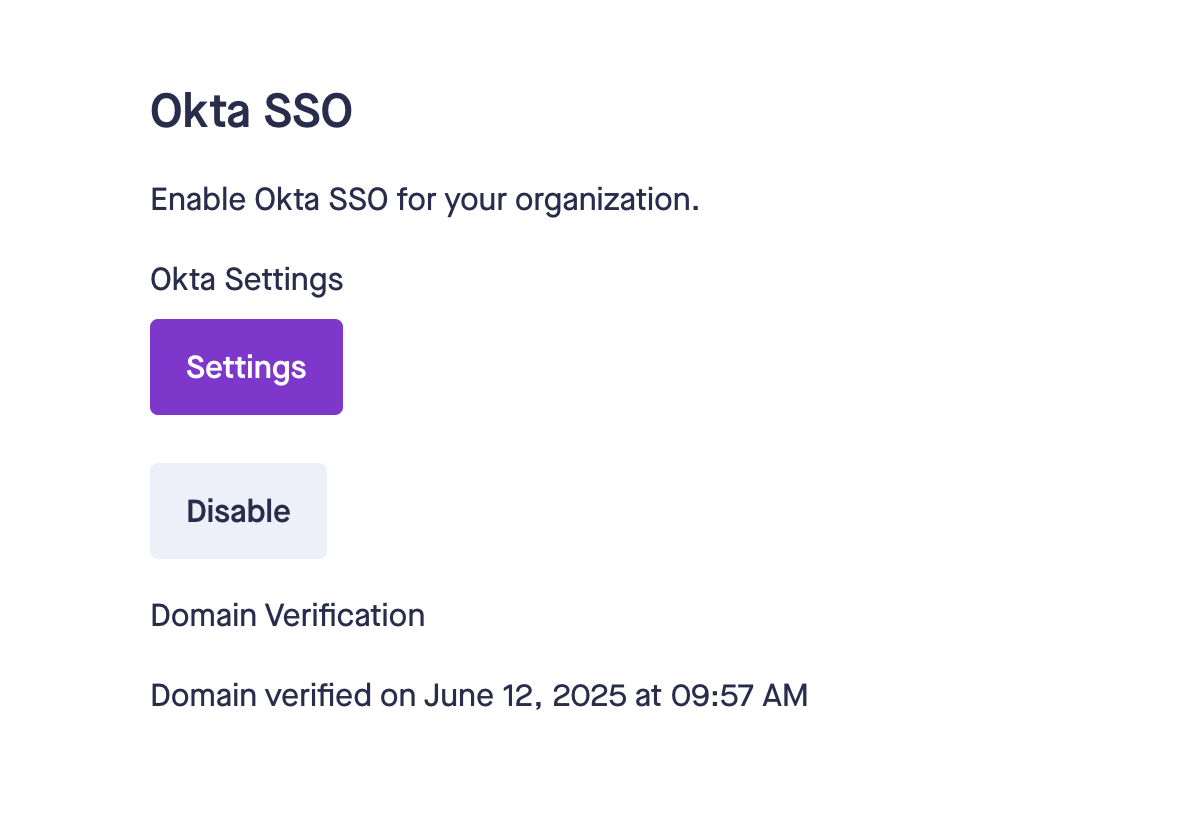
- Your Okta users can now access Pusher via the Pusher Okta app in your organization’s Okta dashboard.
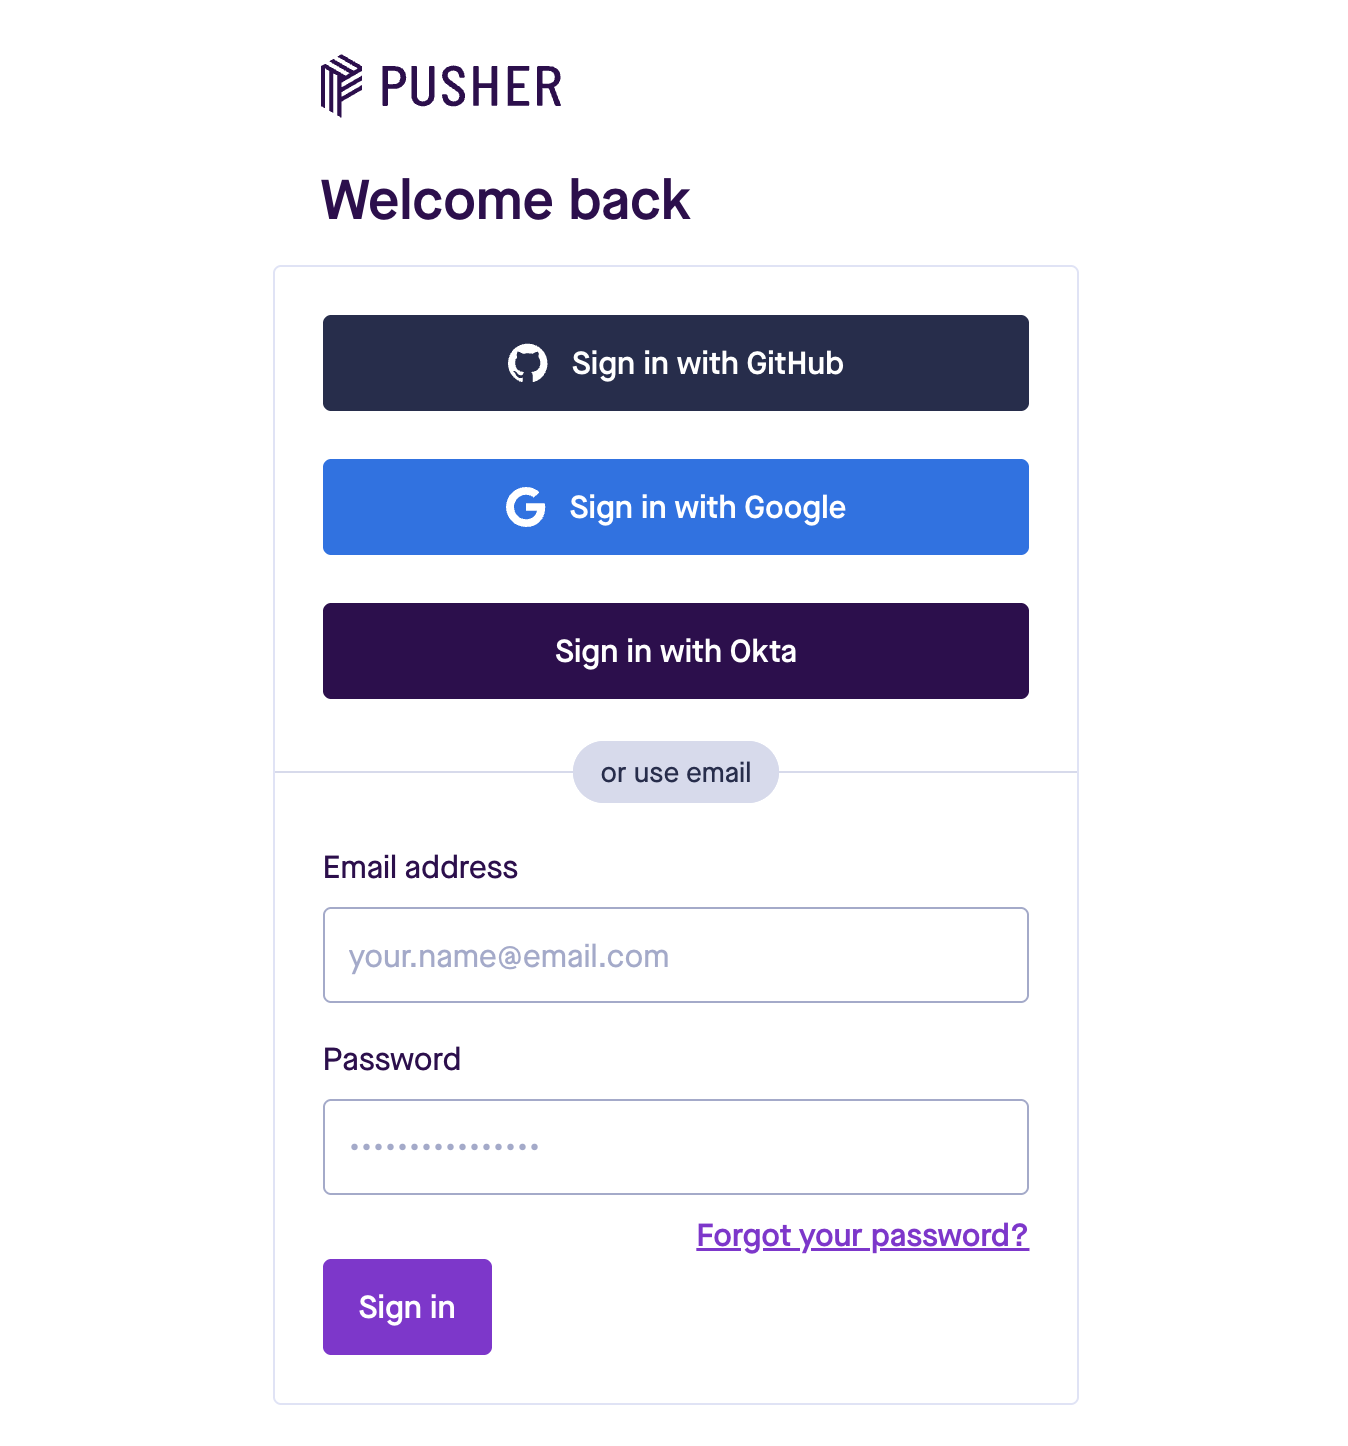
NOTE: Pusher dashboard doesn’t support multi-tenancy at the moment. To identify your issuer, SSO logins must be initiated through the Okta dashboard using the configured Pusher app. - Users can click on “Sign in with Okta” to sign in: